Making Old Faces With Photoshop (Age Progression) - Today we will learn how to edit faces predict the development of Age with the following Photoshop tutorials. I'll use Photoshop CS6. It will work on almost any version of Photoshop. You can see how you look like in the 60s and 70s you. Its very simple and takes less time for you to do this. So let's get started.

Making Old Faces With Photoshop (Age Progression)
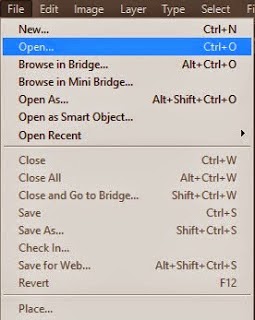
1st Step: Open the image you need to advancing age. So to do that just go to File / Open or press Ctrl + O.
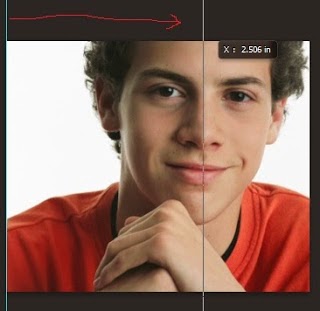
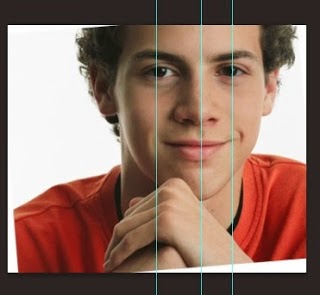
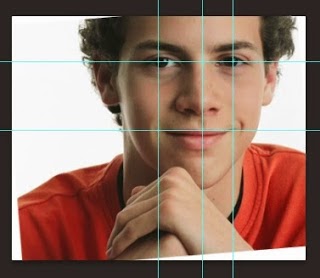
2nd Step: Now you need to enter the Guide line on the photo. Make sure it is selected and in the vertical position of 0.
3rd Step: Grab the move tool and grab the guide line to the center of the nose.
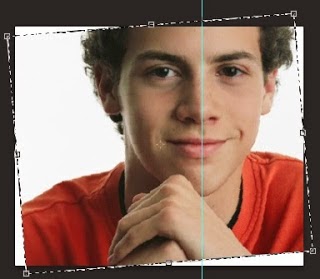
4th Step: Now you need to level the image if not straight. To do that, press Ctrl + A and Ctrl + T. You can now move and rotate images.
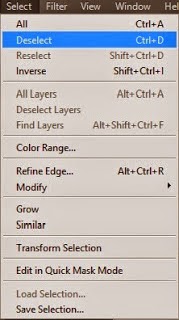
5th Step: After doing press Enter and go to Select / Deselect.
6th Step: 2 Now make another guide lines as I pointed out earlier and put it in the middle of the eye.
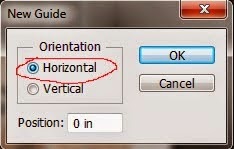
7th Step: Get another guide line and this time select Horizontal.
8th Step: Now put your line in the corners of the mouth.
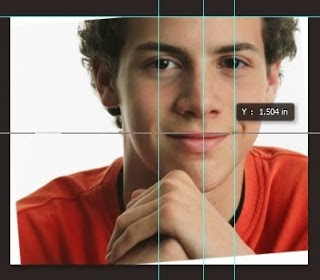
9th Step: Now the other horizontal guide line and it must be run through both eyes.
10th Step: Now you need to find a good image of the elderly. The main thing is to be in accordance with the skin color of the image before you take to the advancement of age.

11th Step: Open and press Ctrl + A and Ctrl + C

12th Step: Now back to the original image and press Ctrl + V.
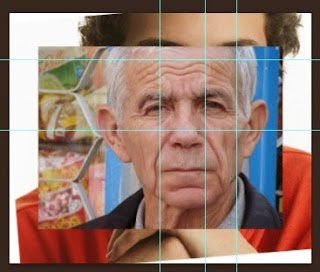
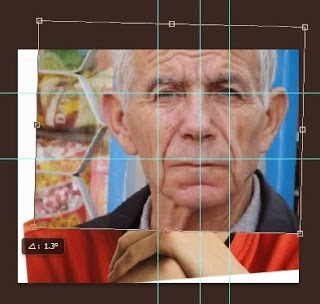
13th Step: Now picture the parents will be placed on top of the original image. Now you need to customize all the features of the parents for the younger children. press Ctrl + T to rotate and move the image. Make sure it goes through the guide line and press Enter.
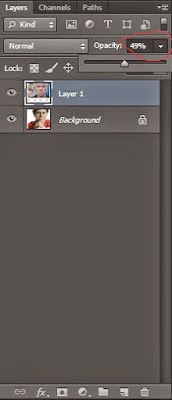
14th Step: Now you need to reduce the Opacity to give the old view the original image. Adjust it to a perfect fit. I recommend 45-50.
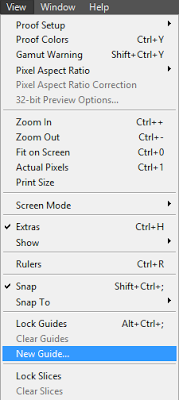
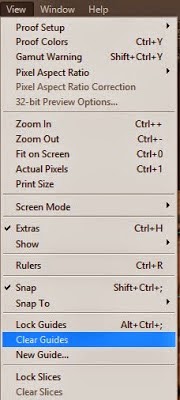
15th Step: Now you have to remove the guide, to go to View / Clear guides.
16th Step: Now we need to plug up the image and give the appearance of the original parents. grab the Eraser tool from the tool bar or else press E.

with the Eraser tool, it is clear from the background and the excessive part of the image that you do not want to change. Make sure before you remove the eraser hardness is set around 45.
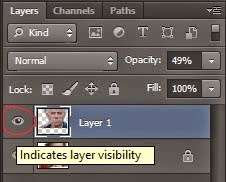
18th Step:. If you have any doubt that that is the original image and who are parents, you can deselect the eye icon on the layer invisible.
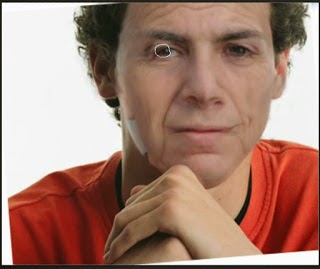
19th Step: Now you have to make the eyes highlighted by removing excessive drawings old man's.
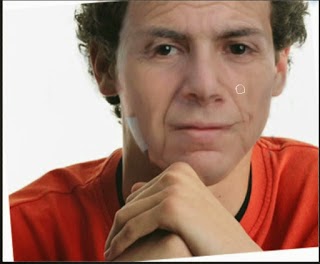
20th Step: Now the same thing for the nose and mouth.
21st Step: Now that you've finished !!! You can save your image. If you have any doubts, leave it in the comments I will help you.

Making Old Faces With Photoshop (Age Progression)
1st Step: Open the image you need to advancing age. So to do that just go to File / Open or press Ctrl + O.
2nd Step: Now you need to enter the Guide line on the photo. Make sure it is selected and in the vertical position of 0.
3rd Step: Grab the move tool and grab the guide line to the center of the nose.
4th Step: Now you need to level the image if not straight. To do that, press Ctrl + A and Ctrl + T. You can now move and rotate images.
5th Step: After doing press Enter and go to Select / Deselect.
6th Step: 2 Now make another guide lines as I pointed out earlier and put it in the middle of the eye.
7th Step: Get another guide line and this time select Horizontal.
8th Step: Now put your line in the corners of the mouth.
9th Step: Now the other horizontal guide line and it must be run through both eyes.
10th Step: Now you need to find a good image of the elderly. The main thing is to be in accordance with the skin color of the image before you take to the advancement of age.
11th Step: Open and press Ctrl + A and Ctrl + C
12th Step: Now back to the original image and press Ctrl + V.
13th Step: Now picture the parents will be placed on top of the original image. Now you need to customize all the features of the parents for the younger children. press Ctrl + T to rotate and move the image. Make sure it goes through the guide line and press Enter.
14th Step: Now you need to reduce the Opacity to give the old view the original image. Adjust it to a perfect fit. I recommend 45-50.
15th Step: Now you have to remove the guide, to go to View / Clear guides.
16th Step: Now we need to plug up the image and give the appearance of the original parents. grab the Eraser tool from the tool bar or else press E.
with the Eraser tool, it is clear from the background and the excessive part of the image that you do not want to change. Make sure before you remove the eraser hardness is set around 45.
18th Step:. If you have any doubt that that is the original image and who are parents, you can deselect the eye icon on the layer invisible.
19th Step: Now you have to make the eyes highlighted by removing excessive drawings old man's.
20th Step: Now the same thing for the nose and mouth.
21st Step: Now that you've finished !!! You can save your image. If you have any doubts, leave it in the comments I will help you.