Make Serrations In Object Curve

Consider the step step by step below;
1 Create a line with the Freehand tool in the Toolbox, point your mouse and click in the work area separated laterally slide and click;

2 Still in the toolbox, looking Distort tool, on the Property Bar select Zipper Distortion> Amplitude Zipper contents with item 16> Zipper Frequency by number 26, and the results look something like this;

3 Slide the navigation to the right, then the serrations would be inclined to right;

4 In the Property Bar click Smooth distortion, to change the angle of the taper becomes smooth;

5. Next select the Envelope tool in the Toolbox, set the object in such a way to direct the mouse cursor on the line strips and slide the slide to edit it, to produce a curved object, like the image below;

6 Then select the Freehand tool you click on the start node, add the line extending fore, as well as the end node (end) add the line also extends to the end;

7 When finished adding a line at the base and tip, duplicate objects with massage Ctrl + D on the keyboard, and the Mirror Vertically massage in the Property Bar and scroll down a bit to adjust the position of the object, then the object and the second selection button massage Combine to combine two objects into a single unit;

8 Furthermore, in the Toolbox select the Shape tool selection command at the end of the two-node object and then click the Extend curve to a close with a goal to close the ends of the curve on the object;

9 Further Selection of the node that I circled in red, and click Convert to curve, to turn a straight line into a curve;

10 Selection of nodes that I circled in red, and click on the Property Bar Smooth node;

11. And sliding Shape tool bit with the mouse to the right, so that the result is as shown below;

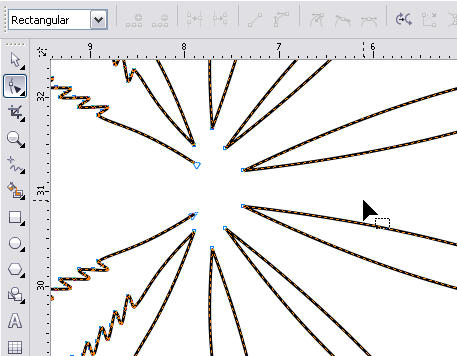
12. Next massage Ctrl + D on your keyboard to duplicate and with the Pick tool, zoom size, rotate, or rotate the object, do such steps repeatedly, until according to the picture in question, then select all objects with massage Ctrl + A on the keyboard and click Combine button in the Property Bar;

13 Selection one by one node at each intersection of the line;

14. Click the button Joint And two nodes on the Property Bar to merge nodes so that the end of the line will be connected;

15. So the result will be as shown below;
16. To make the handle object selection and select the command Freehand tool in the Toolbox and then click on the start node and end node cap on;

17. Next select the Shape tool in the Toolbox command, then the selection of the nodes on the Property Bar stalk and to massage the Convert button to convert line to curve into a curve, and edit the line using the Shape tool;

18. Give white color in the Color Palette on the object and make the object box with the Rectangle tool in the Toolbox and give a black color, press Ctrl + PageDown to change the position of the object box below the image that we have had, and the final result as shown below;
