Making a quick water material in 3ds Max.
In this tutorial I will show how to make a quick water material in 3d Max. Keep in mind
there’s no special plugins used, just 3d Max materials, which will render much quicker.
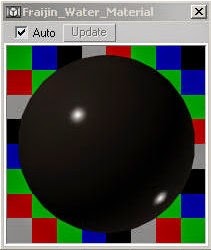
Open up the materials window. Pick a new material and change the diffuse color to a dark brown, so we can make some dirty water. Also change the “Specular” value to 90, and the “Glossiness” to 70.
Go down to Maps - bump change the value to 30, hit none and choose noise material. Change the X and Y tiling value to 2, also choose fractal for “Noise Type”.
Now lets do the reflections. Change the reflection value to 30, hit none and choose Reflect/Refract material. The default Size value of a 100 works well and quick during render time, but if you want to see more details just increase the value; I’m going to increase it to 200. Change the Blur Offset value to .01, this will slightly blur the reflections.
Now lets move on to the refractions. Change the refraction value to 40. You can increase this value to make the water look clearer. Anyway hit none and choose Raytrace. Go down to Background and choose the black color box instead of “Use Environment Settings”.
The water material is done, and yes it doesn’t look like much now.
Now we’re going to make a quick environment for the water. Create a “Plane” surface, with a 150 length, 150 width, both length and width segments has a value of 1, turn on the “Generate Mapping Coords”. Clone that plane and move it down to –40 on its Z-axis. Create a sphere with a radius of 20, and two omni lights. Don’t turn on “Cast Shadows” for either of them. The setup should look like this.
Apply the water material to the top plane. Pick a new material, go down to Maps – Diffuse Color, hit none and pick bitmap. Find a nice looking ground texture from the 3d max folder (such as “GRYDIRT1.jpg”) and apply that material to the bottom plane. Pick a new material and change the Diffuse Color to white. Go down to Maps – Reflections, give it a value of 10, hit none and choose Reflect/Refract material. Apply that to the sphere.
Now we’ll make some fog to give the water a murky appearance. Go up to the menu Rendering - Environment. Go down to Atmosphere and add Fog. Change the Fog Type to Layered, and change the “Top” value to 0, “Bottom” to –40, and “Density” to 200. We still don’t have a sky so in the same environment window hit the “Environment Map” box. Click on “Mtl Library” and choose the HongKong Background. And that’s about it.
.jpg)
.jpg)
.jpg)
.jpg)
.jpg)
.jpg)
.jpg)